Have you ever scrolled through someone’s vacation photos and felt a pang of jealousy?
Their pictures pop, no matter the subject, with just the right highlights, angles, and details considered. You wonder how they managed to capture all of that with just their phone.
Good travel photography is something we all aspire to, although we succeed in varying degrees. The good news, though, is that it's easy to improve your photo skills. Persistent problems like pixelated photos, shadowy subjects, and just plain boring candid shots can be remedied with these simple fixes.
By following these eight tips, you can take your travel photography to the next level. Oh, and you can practice them in the comfort of your home.
1. The Simple Fixes
Some of these tips are more comprehensive than others, and it’s designed that way. You should improve your photography skills in increments, and as you get better, your tweaks become more nuanced and take more practice to master.
But there are little, easy things you can do that will immediately improve your shots:
- Clean your lens, and keep it clean with a small cloth. If you’re ever wondering why your pictures aren’t as clear as your friends, there’s a good chance your lens isn’t clean.
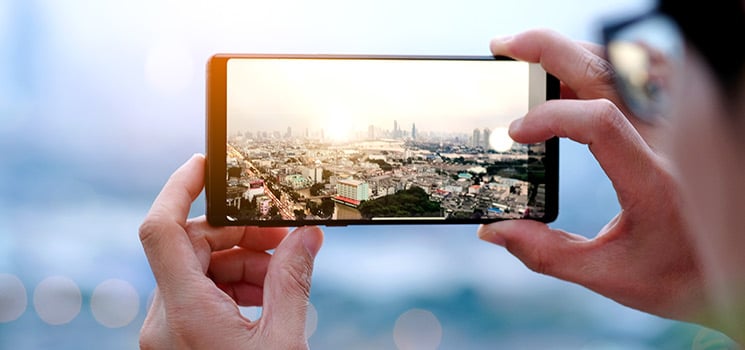
- Take horizontal, not vertical shots for three reasons: They work better on bigger screens (think of the orientation of a desktop). They’re easier to crop to close in on the subject. Using the volume control as the shutter makes steadying the shot easier.
- Invest in a battery pack for the simple reason that you can’t take photos or video if your phone is dead.
- Be mindful of the side of the phone your camera lens is on. Most are not in the middle, and flipping the phone will give you two different pictures. Try it out. You may prefer one to the other.
Okay, now that you’ve implemented these simple fixes, it’s time to focus on advanced concepts.
2. Avoid Zooming In
“If your pictures aren’t good enough, you’re not close enough.” That’s the advice of famed photographer Robert Capa. And you can put it into practice easily: Take a picture of an object across the room, using the zoom function on your phone camera. Now, walk across the room and take the same picture close. Notice a difference in clarity? Of course you do.
The zoom function tends to pixelate pictures, which not only looks bad, it also leaves little room for improvements—you can only touch up so much. There is one scenario where zoom does work, and it’s probably not what you think. Take the picture from a distance, zoom, and crop afterward. It’ll be clearer than if you zoomed while clicking the actual photo.
So when you find that perfect shot on vacation, think about this rule. Get as close as possible. And if you need to snap a pic from a distance, zoom and crop after the fact. Your photos will be better for it.
3. Add Gridlines
Have you ever spent time taking multiple photos of the same thing (family portraits, pets, etc.), trying to get the symmetry just right? Or dragged your finger on the crop function, changing the tilt of the photo? You can save time, and take better pictures overall, if you add gridlines to your camera.
On an iPhone, you can turn the grid on by clicking into “Camera” on settings and sliding the button across on “Grid.” When you open your camera, you should see three rows and three columns of rectangles.
This will help you position your camera just right, but it’s also important for vacations. Think about how often you hand your phone to a fellow traveler to snap a picture of you and your group. The grids will help them take a quality photo without the awkwardness of going back and forth multiple times.
Gridlines also help with the next tip...
4. Follow the Rule of Thirds
The rule of thirds applies more to adding an artsy aspect to your photos. It refers not to the spaces on the aforementioned grid, but to the lines. The theory holds that subjects captured along those lines and, especially, where they intersect appear more interesting.
And while that’s a subjective term, the theory will have you thinking about how you take a picture, in addition to what you’re taking a picture of.
This is also an easy one to practice at home. Once your grids are turned on, apply the rule of thirds with a household item—a house plant, candle, or desk scene works well—or housemate (including pets).
5. Change Your Perspective—Literally
For some trips, you may be focused on landmarks. Getting a clear shot matters the most, whether that’s the landmark itself or you in front of it. But for scrapbook photos, it’s best to imagine yourself flipping through a book. Would you want to see the same style of picture on each page? Probably not.
So how do you break up the monotony? Play with perspective and vantage points. By getting down low or climbing high above an object, you can capture it in a way that passersby miss. It also allows you to tell a story by better conveying the emotion of the moment—the immensity of a building by taking a picture from up against it, the beauty of a city by capturing the skyline from a roof deck.
Toy with the concept at home by taking in the room around you. Next, get down to the floor and snap a photo. Do the same from a stool, chair, or step ladder. You might be surprised by what you get on camera.
6. Embrace Negative Space
Negative space is essentially the backdrop of your photo’s subject. It could be a wall. It could be a table or a floor if you’re taking the photo from above. By following the rule of thirds and highlighting some of the negative space, you can often bring about details of your subject. You can juxtapose patterns. You can show differences in size. And you can contrast two things because, simply, it looks cooler.
But thinking about negative space helps you tell the story of the whole scene, not just the subject.
7. Use Flash...During the Day
Similar to the zoom function, flash is something that’s better left untouched. At night, it can produce odd contrasts, not to mention the dreaded red eyes. It’s better to rely on natural light or street lights, even if it means you add touch-ups to your photos later on.
Having said that, flash can be useful during the day. If your pictures carry shadows or they don’t quite look right, switch on the flash. The natural light will still dominate with the flash taking care of the shadowed areas. In doing so, your subject will pop more.
8. Sharpen Your Editing Skills
Instagram filters are one thing. Actual touch-ups on your photos are another. You’ve likely wondered about how to make your pictures pop or simply how to turn your average candids into works of art.
That’s tough to do during a trip. After all, who wants to spend time on vacation tinkering with photos?
There’s no better time to sharpen your editing skills than when you’re home. Downtime allows you to experiment with different filters, lightings, angles, and more on photos that won’t make your social media feed. There are some great apps to help you do just that, including Snapseed, Afterlight, and Instasize.
Practice with everyday pictures so that when you get that perfect sunset at the beach, a cityscape at dusk, or a mouth-watering dish, you can capture it in all its glory.


